It said "Install Windows 7 or better", so I installed Ubuntu.....
Redhat is supposed to be the leader in open source community; however, with long releasing cycle and sort of "closed" packing practices, Redhat is gradually losing the leadership. Issues like the painful process of upgrading Python in Redhat Linux distribution has bothered the open source community. It's time to look for a better open source Linux distribution - Ubuntu.
The installation is very easy - download the iso image of ubuntu from its website, create a new vmware host with 8GB virtual disk and 1GB RAM (my laptop has total 4GB RAM), choose "ubuntu" as operating system (these technology leaders really know how to cooperate with each other!), setup NAT network for the new host and pick the iso image as boot image (With vmware's virtual CDROM, I didn't even need to burn the iso file to CD); finally fire up the vmware host then take a break practicing DJHero Daft Punk Megamix. 20 minutes later, my Toshiba laptop powered by Intel Core 2 Duo Processor, 4GB RAM is welcoming a new vmware host member - ubuntu.
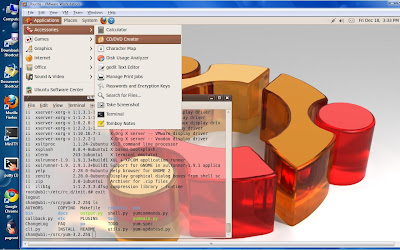
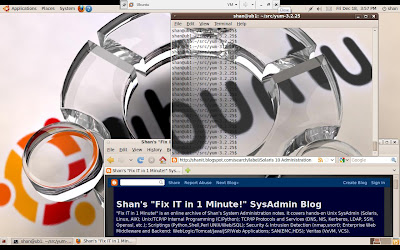
(Ubuntu 9.10 Desktop Screenshots)

Bash is installed as default shell, most popular open source tools are installed. There are two distributions - Desktop and Server. Desktop has the GUI environment and most UNIX end-user tools installed, Python 2.6 and gcc along with other development tools are installed; however, server products like apache, tomcat, are not. yum is also not installed. For Sys Admins, you may have to choose to install the desktop or server edition. I actually have a very good solution - install both and convert the desktop edition to server by reinstalling server's extra packages (the actually upgrade process is at the end of this blog).
Using ubuntu is just as easy as installing it. One of the nice features for ubuntu is the ability to update packages automatically. The system silently checks for the latest packages, releases. When a cluster of new packages is available, it will pop up a menu and suggest users to update... Making it short, I really don't want to look back once I start to use ubuntu.
With 3 major UNIX OSs in one laptop (Solaris, RHEL, Ubuntu), the fun just begins... Very soon, I probably need a new laptop with Quad Core CPU and 8GB - 16GB RAM.
Cheers!

Is the terminal's transparent mode correct?
Ubuntu Server Configuration:
Server installation doesn't come with GUI. For most Intel Duo Core CPU laptops/PCs, installing 64-bit server may create problems. Someone has re-compiled ubuntu kernel on these CPUs, if you need to borrow the compiled kernels, google "ubuntu 64 bit kernel for Intel Duo Core". If you don't care about performance and ubuntu's 3-D desktop features (actually I do!) 32 bit kernel is an easy option for most Laptops/PCs.
The standard server installation doesn't have all the packages by default. But the installation is fairly simple and straight.
Command execution is very very fast!
To install yum, sshd, apache and other packages:
sudo apt-get install yum
sudo apt-get install openssh-server
sudo apt-get install gcc
sudo apt-get install apache2
To get a list of selections:
root@ubuntu:~# dpkg --get-selections | awk '{rpint $1}' > pkglist
To install all perl packages:
root@ubuntu:~# for i in $(dpkg --get-selections | grep perl | awk '{print $1}'); do echo $i; apt-get -y install $i; done
To find out what packages are installed:
root@ubuntu:~#dpkg --list
To find out files owned by a package:
root@ubuntu:~# dpkg -L openjdk-6-jre
/.
/usr
/usr/lib
/usr/lib/jvm
/usr/lib/jvm/java-6-openjdk
/usr/lib/jvm/java-6-openjdk/jre
/usr/lib/jvm/java-6-openjdk/jre/bin
/usr/lib/jvm/java-6-openjdk/jre/bin/javaws
/usr/lib/jvm/java-6-openjdk/jre/bin/pluginappletviewer
/usr/lib/jvm/java-6-openjdk/jre/bin/policytool
/usr/lib/jvm/java-6-openjdk/jre/bin/javaws.real
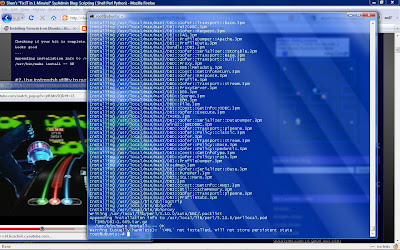
(Ubuntu 9.10 Server, DJHero Daft Punk Megamix, PacMan)

(auto) Install server packages on ubuntu desktop host: (this will give you GUI and all the packages on the server)
create a list of installed packages on both desktop and server, e.g.
On the desktop:
#dpkg --get-selections* | awk '{print $1}' > pkglist.desktop
On the server:
#dpgk --get-selections* | awk '{print $1}' > pkglist.server
scp server's pkglist to the host running desktop edition.
On the desktop host, install the server's additional packages:
for i in $(diff pkglist pkglist2 | grep '<' | cut -d' ' -f2); do echo $i; apt-get -y install $i; done
Next, install tomcat and verify apache2 mod_jk and mod_proxy modules. Create and import a test database into mysql. Perl's base packages are installed, I cpan a few Perl modules for database and web scripting. For additional packages, apt-get and yum are our best friends.
Because my laptop's video card, I am not able to play with Ubuntu's 3D desktop. I'll leave that to my desktop computer.
That's it! In less than an hour, starting from scratch, we build a fully loaded standalone Linux server with beautiful desktop and faster, smoother performance!

