Installing Ubuntu 9.10 on Vmware Hosts and Configure Ubuntu Server


It said "Install Windows 7 or better", so I installed Ubuntu.....
Redhat is supposed to be the leader in open source community; however, with long releasing cycle and sort of "closed" packing practices, Redhat is gradually losing the leadership. Issues like the painful process of upgrading Python in Redhat Linux distribution has bothered the open source community. It's time to look for a better open source Linux distribution - Ubuntu.

The installation is very easy - download the iso image of ubuntu from its website, create a new vmware host with 8GB virtual disk and 1GB RAM (my laptop has total 4GB RAM), choose "ubuntu" as operating system (these technology leaders really know how to cooperate with each other!), setup NAT network for the new host and pick the iso image as boot image (With vmware's virtual CDROM, I didn't even need to burn the iso file to CD); finally fire up the vmware host then take a break practicing DJHero Daft Punk Megamix. 20 minutes later, my Toshiba laptop powered by Intel Core 2 Duo Processor, 4GB RAM is welcoming a new vmware host member - ubuntu.

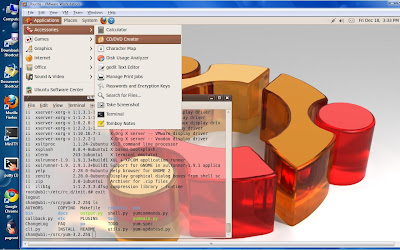
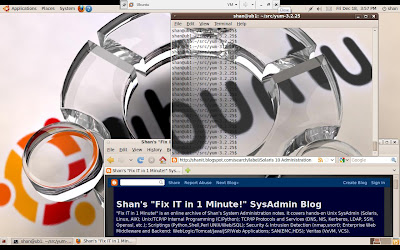
(Ubuntu 9.10 Desktop Screenshots)


Bash is installed as default shell, most popular open source tools are installed. There are two distributions - Desktop and Server. Desktop has the GUI environment and most UNIX end-user tools installed, Python 2.6 and gcc along with other development tools are installed; however, server products like apache, tomcat, are not. yum is also not installed. For Sys Admins, you may have to choose to install the desktop or server edition. I actually have a very good solution - install both and convert the desktop edition to server by reinstalling server's extra packages (the actually upgrade process is at the end of this blog).

Using ubuntu is just as easy as installing it. One of the nice features for ubuntu is the ability to update packages automatically. The system silently checks for the latest packages, releases. When a cluster of new packages is available, it will pop up a menu and suggest users to update... Making it short, I really don't want to look back once I start to use ubuntu.


With 3 major UNIX OSs in one laptop (Solaris, RHEL, Ubuntu), the fun just begins... Very soon, I probably need a new laptop with Quad Core CPU and 8GB - 16GB RAM.

Cheers!


Is the terminal's transparent mode correct?


Ubuntu Server Configuration:

Server installation doesn't come with GUI. For most Intel Duo Core CPU laptops/PCs, installing 64-bit server may create problems. Someone has re-compiled ubuntu kernel on these CPUs, if you need to borrow the compiled kernels, google "ubuntu 64 bit kernel for Intel Duo Core". If you don't care about performance and ubuntu's 3-D desktop features (actually I do!) 32 bit kernel is an easy option for most Laptops/PCs.

The standard server installation doesn't have all the packages by default. But the installation is fairly simple and straight.

Command execution is very very fast!

To install yum, sshd, apache and other packages:

sudo apt-get install yum
sudo apt-get install openssh-server
sudo apt-get install gcc
sudo apt-get install apache2

To get a list of selections:
root@ubuntu:~# dpkg --get-selections | awk '{rpint $1}' > pkglist

To install all perl packages:
root@ubuntu:~# for i in $(dpkg --get-selections | grep perl | awk '{print $1}'); do echo $i; apt-get -y install $i; done

To find out what packages are installed:
root@ubuntu:~#dpkg --list

To find out files owned by a package:
root@ubuntu:~# dpkg -L openjdk-6-jre
/.
/usr
/usr/lib
/usr/lib/jvm
/usr/lib/jvm/java-6-openjdk
/usr/lib/jvm/java-6-openjdk/jre
/usr/lib/jvm/java-6-openjdk/jre/bin
/usr/lib/jvm/java-6-openjdk/jre/bin/javaws
/usr/lib/jvm/java-6-openjdk/jre/bin/pluginappletviewer
/usr/lib/jvm/java-6-openjdk/jre/bin/policytool
/usr/lib/jvm/java-6-openjdk/jre/bin/javaws.real

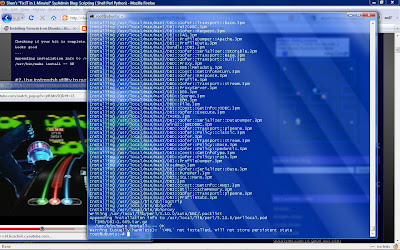
(Ubuntu 9.10 Server, DJHero Daft Punk Megamix, PacMan)


(auto) Install server packages on ubuntu desktop host: (this will give you GUI and all the packages on the server)

create a list of installed packages on both desktop and server, e.g.

On the desktop:
#dpkg --get-selections* | awk '{print $1}' > pkglist.desktop

On the server:
#dpgk --get-selections* | awk '{print $1}' > pkglist.server
scp server's pkglist to the host running desktop edition.


On the desktop host, install the server's additional packages:

for i in $(diff pkglist pkglist2 | grep '<' | cut -d' ' -f2); do echo $i; apt-get -y install $i; done

Next, install tomcat and verify apache2 mod_jk and mod_proxy modules. Create and import a test database into mysql. Perl's base packages are installed, I cpan a few Perl modules for database and web scripting. For additional packages, apt-get and yum are our best friends.

Because my laptop's video card, I am not able to play with Ubuntu's 3D desktop. I'll leave that to my desktop computer.

That's it! In less than an hour, starting from scratch, we build a fully loaded standalone Linux server with beautiful desktop and faster, smoother performance!

Solaris 10 Administration


(Sun E10000, 64 CPUs and 64 GB RAM, 16 SBs, up to 16 domains)


Solaris Volume Manager

Metastate Database
The state database stores information on disk about the state of VM config.
Multiple copies of the database, called replicas, provide redundancy and
protect against data loss if a copy of the database is corrupted.

1 Disk - min 3 replicas
2-4 Disks - 2 replicas each disk
5 or more disks - 1 replica on each disk

Majority Consensus Alogrithm
- at least half of the replicas are available
- causes the system to panic if fewer than half of the replicas available
- won't start VM unless majority replicas are available


#metadb -a [-f] [-c n] [-l nn] disk_slice

-a adds a state database replica
-f forces the operation
-c n specifies the number of the replicas to add to the slice
-l nnn specifies the size of the new replicas, in blocks
disk_slice specifies the disk_slice will hold the replica


#metadb -a -f c0t0d0s4 c0t0d0s5 c1t0d0s1
#metadb -a -f -c 2 c3t2d0s7 c3t3d0s7

#metadb

#metainit -f name numstripes width component...

#metainit -f d0 2 1 c0t0d0s7 c3t2d0s0

#metastat

#ls -iL /dev/md/dsk

#ls -il /dev/md/rdsk

#growfs -M /export/home /dev/md/rdsk/d0


SVM Operation Examples:
------------------------------------------------------------------------------

vfstab

#device device mount FS fsck mount mount
#to mount to fsck point type pass at boot options
#
fd - /dev/fd fd - no -
/proc - /proc proc - no -
/dev/md/dsk/d1 - - swap - no -
/dev/md/dsk/d0 /dev/md/rdsk/d0 / ufs 1 no logging
/dev/md/dsk/d6 /dev/md/rdsk/d6 /zones ufs 2 yes -
/devices - /devices devfs - no -
ctfs - /system/contract ctfs - no -
objfs - /system/object objfs - no -
swap - /tmp tmpfs - yes -

------------------------------------------------------------------------------

ROOT@server1:/root # metadb
flags first blk block count
a m p luo 16 8192 /dev/dsk/c0t0d0s7
a p luo 8208 8192 /dev/dsk/c0t0d0s7
a p luo 16400 8192 /dev/dsk/c0t0d0s7

a = active
size = 8192blk = 4MB

---------------------------------------------------------------------------

layout of the disk

Part Tag Flag Cylinders Size Blocks
0 root wm 2241 - 4481 8.00GB (2241/0/0) 16780608
1 swap wu 0 - 2240 8.00GB (2241/0/0) 16780608
2 backup wm 0 - 38342 136.91GB (38343/0/0) 287112384
3 unassigned wm 0 0 (0/0/0) 0
4 unassigned wm 0 0 (0/0/0) 0
5 unassigned wm 0 0 (0/0/0) 0
6 unassigned wm 4482 - 6722 8.00GB (2241/0/0) 16780608
7 unassigned wm 6723 - 6731 32.91MB (9/0/0) 67392

----------------------------------------------------------------------------


metadb - creates state db replicas

metadb -a -f c0t0d0s4 c0t0d0s5 c1t0d0s0 c1t0d0s1
metadb -a -f -c n -l nnn disk_slice
-f force operation
-c n specifies the number of replicas to add to the slice
-l nnn specifies the size of the new replica in blocks
disk_slice specifies the slice will hold the replica


metainit - creates the metadevices.

metainit -f concat/stripe numstripes witdth component

metainit -f d0 2 1 c0t0d0s7 1 c3t2d0s0


metastat - checks the metadevice configuration

ROOT@server1:/root # metastat
d6: Mirror
Submirror 0: d16
State: Okay
Pass: 1
Read option: roundrobin (default)
Write option: parallel (default)
Size: 16780608 blocks (8.0 GB)

d16: Submirror of d6
State: Okay
Size: 16780608 blocks (8.0 GB)
Stripe 0:
Device Start Block Dbase State Reloc Hot Spare
c0t0d0s6 0 No Okay Yes


d1: Mirror
Submirror 0: d11
State: Okay
Pass: 1
Read option: roundrobin (default)
Write option: parallel (default)
Size: 16780608 blocks (8.0 GB)

d11: Submirror of d1
State: Okay
Size: 16780608 blocks (8.0 GB)
Stripe 0:
Device Start Block Dbase State Reloc Hot Spare
c0t0d0s1 0 No Okay Yes


d0: Mirror
Submirror 0: d10
State: Okay
Pass: 1
Read option: roundrobin (default)
Write option: parallel (default)
Size: 16780608 blocks (8.0 GB)

d10: Submirror of d0
State: Okay
Size: 16780608 blocks (8.0 GB)
Stripe 0:
Device Start Block Dbase State Reloc Hot Spare
c0t0d0s0 0 No Okay Yes


Device Relocation Information:
Device Reloc Device ID
c0t0d0 Yes id1,sd@SFUJITSU_MAW3147NC_______DAF4P7400LPR


ROOT@server1:/root # ls -lL /dev/md/dsk
total 0
brw-r----- 1 root sys 85, 0 Jul 19 16:39 d0
brw-r----- 1 root sys 85, 1 Jul 20 06:12 d1
brw-r----- 1 root sys 85, 10 Jul 20 06:12 d10
brw-r----- 1 root sys 85, 11 Jul 20 06:12 d11
brw-r----- 1 root sys 85, 16 Jul 20 06:12 d16
brw-r----- 1 root sys 85, 6 Jul 19 16:40 d6


Create a swap and a dump fs:

1. create partition 3 and 4: (using the number and lable command in format)
partition> p
Current partition table (unnamed):
Total disk cylinders available: 38343 + 2 (reserved cylinders)

Part Tag Flag Cylinders Size Blocks
0 root wm 2241 - 4481 8.00GB (2241/0/0) 16780608
1 swap wu 0 - 2240 8.00GB (2241/0/0) 16780608
2 backup wm 0 - 38342 136.91GB (38343/0/0) 287112384
3 unassigned wm 6732 - 22415 56.00GB (15684/0/0) 117441792
4 unassigned wm 22416 - 26897 16.00GB (4482/0/0) 33561216
5 unassigned wm 0 0 (0/0/0) 0
6 unassigned wm 4482 - 6722 8.00GB (2241/0/0) 16780608
7 unassigned wm 6723 - 6731 32.91MB (9/0/0) 67392


2. Create the meta device d3 and d4

/usr/sbin/metainit -f d3 1 1 c0t0d0s3

/usr/sbin/metainit -f d4 1 1 c0t0d0s4


3. check:

metastat

d4: Concat/Stripe
Size: 33561216 blocks (16 GB)
Stripe 0:
Device Start Block Dbase Reloc
c0t0d0s4 0 No Yes

d3: Concat/Stripe
Size: 117441792 blocks (56 GB)
Stripe 0:
Device Start Block Dbase Reloc
c0t0d0s3 0 No Yes

Device Relocation Information:
Device Reloc Device ID
c0t0d0 Yes id1,sd@SFUJITSU_MAW3147NC_______DAF4P7400LPR

-----------------------------------------------------------------------------------------
ROOT@server1:/root # newfs -N -v /dev/md/rdsk/d4
mkfs -F ufs -o N /dev/md/rdsk/d4 33561216 -1 -1 8192 1024 155 1 167 8192 t 0 -1 8 16 n
Warning: 3456 sector(s) in last cylinder unallocated
/dev/md/rdsk/d4: 33561216 sectors in 5463 cylinders of 48 tracks, 128 sectors
16387.3MB in 342 cyl groups (16 c/g, 48.00MB/g, 5824 i/g)
Warning: 0 sector(s) in last cylinder unallocated
/dev/md/rdsk/d4: 33561216 sectors in 4482 cylinders of 8 tracks, 936 sectors
16387.3MB in 321 cyl groups (14 c/g, 51.19MB/g, 6208 i/g)
Error determining alternate superblock locations
-------------------------------------------------------------------------------------------


ROOT@server1:/root # newfs -v /dev/md/rdsk/d4
newfs: construct a new file system /dev/md/rdsk/d4: (y/n)? y
mkfs -F ufs /dev/md/rdsk/d4 33561216 -1 -1 8192 1024 155 1 167 8192 t 0 -1 8 16 n
Warning: 3456 sector(s) in last cylinder unallocated
/dev/md/rdsk/d4: 33561216 sectors in 5463 cylinders of 48 tracks, 128 sectors
16387.3MB in 342 cyl groups (16 c/g, 48.00MB/g, 5824 i/g)
super-block backups (for fsck -F ufs -o b=#) at:
32, 98464, 196896, 295328, 393760, 492192, 590624, 689056, 787488, 885920,
Initializing cylinder groups:
......
super-block backups for last 10 cylinder groups at:
32638496, 32736928, 32835360, 32933792, 33032224, 33130656, 33229088,
33327520, 33425952, 33524384

copy rootdisk's vtoc to second disk

ROOT@server1:/root # prtvtoc -h /dev/dsk/c0t0d0s2 fmthard -s - /dev/rdsk/c2t0d0s2


create the replica of metadb c2t0d0 disk on slice 7
ROOT@server1:/root # metadb -a -c 3 c2t0d0s7
ROOT@server1:/root # metadb
flags first blk block count
a m p luo 16 8192 /dev/dsk/c0t0d0s7
a p luo 8208 8192 /dev/dsk/c0t0d0s7
a p luo 16400 8192 /dev/dsk/c0t0d0s7
a u 16 8192 /dev/dsk/c2t0d0s7
a u 8208 8192 /dev/dsk/c2t0d0s7
a u 16400 8192 /dev/dsk/c2t0d0s7

2. Mirror existing meta devices:

a. create submirror meta devices
metainit -f d26 1 1 c2t0d0s6
metainit -f d21 1 1 c2t0d0s1
metainit -f d20 1 1 c2t0d0s0


b. metastat shows current meta device d1 has only one submirror md d11 -

ROOT@server1:/root # metastat d1
d1: Mirror
Submirror 0: d11
State: Okay
Pass: 1
Read option: roundrobin (default)
Write option: parallel (default)
Size: 16780608 blocks (8.0 GB)

d11: Submirror of d1
State: Okay
Size: 16780608 blocks (8.0 GB)
Stripe 0:
Device Start Block Dbase State Reloc Hot Spare
c0t0d0s1 0 No Okay Yes


Device Relocation Information:
Device Reloc Device ID
c0t0d0 Yes id1,sd@SFUJITSU_MAW3147NC_______DAF4P7400LPR


c. attach one submirror md - d21

ROOT@server1:/root # metattach d1 d21
d1: submirror d21 is attached


d. metastat shows d21 is attached to d1 as a submirror.
now, d1 has two submirror mds d11 and 21

ROOT@server1:/root # metastat d1
d1: Mirror
Submirror 0: d11
State: Okay
Submirror 1: d21
State: Resyncing
Resync in progress: 0 % done
Pass: 1
Read option: roundrobin (default)
Write option: parallel (default)
Size: 16780608 blocks (8.0 GB)

d11: Submirror of d1
State: Okay
Size: 16780608 blocks (8.0 GB)
Stripe 0:
Device Start Block Dbase State Reloc Hot Spare
c0t0d0s1 0 No Okay Yes


d21: Submirror of d1
State: Resyncing
Size: 16780608 blocks (8.0 GB)
Stripe 0:
Device Start Block Dbase State Reloc Hot Spare
c2t0d0s1 0 No Okay Yes


Device Relocation Information:
Device Reloc Device ID
c0t0d0 Yes id1,sd@SFUJITSU_MAW3147NC_______DAF4P7400LPR
c2t0d0 Yes id1,sd@SFUJITSU_MAW3147NC_______DAF4P7400M19


Create a md mirror from slice - d13 and d23 are submirrors of d3

a. create md from slices
metainit -f d13 1 1 c0t0d0s3
metainit -f d23 1 1 c0t1d0s3

b. link d13 as the first submirror of d3
metainit d3 -m d13

c. link d23 as submirror of d3
metattach d3 d23

AIX Administration


(IBM 9117-570 8-Way LPAR managed by Dual HMCs. EMC DMX Frame 2TB, Sepaton Tape Library. OS: AIX, Applications: Sybase ASE 12.5, Veritas VCS. Function: Backend data warehouse)


AIX Paging Space Management


An very good guide for AIX memory usage is at HERE.


; See real memory size
lsattr -El sys0 | grep realmem

bootinfo -r

svmon -G

; Create Paging
mkps -a -n -s8 rootvg hdisk1
mkps -a -n -s4 rootvg hdisk3


#swapon /dev/paging01

#lsps -a


Display paging:

#lsps -a
Page Space Physical Volume Volume Group Size %Used Active Auto Type
hd6 hdisk0 rootvg 512MB 1 yes yes lv
paging00 hdisk0 rootvg 2560MB 1 yes yes lv


Shrink paging space on the fly:

chps -d decrement_LVs -a y|n paging00


Shrink paging00 by 4 LPs and activate the paging on each subsequent reboot

#chps -d 4 -a y paging00 ; reduce swap space


#swapoff /dev/paging00 ; offline swap space

#rmps paging00 ; to remove paging


;all paging space are defined in /etc/swapspaces file

;to activate all paging space at once
swapon -a

;to deactivate paging03 and remove
swapoff /dev/paging03
rmps paging03

;to reduce the size of paging by two LPs
chps -d2 paging03

;paging summary
mkps
rmps
chps
lsps
swapoff
swapon
chps -s
chps -d
shrinkps
svmon
topas
vmstat
sar
istat
slibclean
ps

Mirrorring Rootdisk

Set Boot list for different options:
===================================================================
bootlist -m normal -o ; to see the bootlist
bootlist -m service -o ; to see the maintenance bootlist
bootlist -m normal -o hdisk0 hdisk4


To mirror rootvg, current bootdisk is hdisk0.
===================================================================
1. Add disk
extendvg -f rootvg hdisk1
chvg -Qn rootvg

2. Mirror data (create LVM structure and sync data)

# mklvcopy hd1 2 hdisk1
# mklvcopy hd2 2 hdisk1
# mklvcopy hd3 2 hdisk1
# mklvcopy hd4 2 hdisk1
# mklvcopy hd5 2 hdisk1
# mklvcopy hd6 2 hdisk1
# mklvcopy hd7 2 hdisk1
# mklvcopy hd8 2 hdisk1
# mklvcopy hd9var 2 hdisk1
# mklvcopy hd10opt 2 hdisk1
# mklvcopy hd11msb 2 hdisk1
# mklvcopy lvtivoli 2 hdisk1

Or use
mirrorvg rootvg ; this will disable qurum

Or use
mirrorvg -s rootvg ; just create LVM structure, no data sync
syncvg -v rootvg ; sync the rootvg data

or use
mirrorvg -S rootvg ; sync data in the background

3.create BLV and boot record

bosboot -ad hdisk1 ; recreate BLV and the boot record on hdisk1
bosboot -ad -u /dev/hdisk1 or

4.Update bootlist
bootlist -m normal hdisk1 hdisk0
bootlist -m service cd0 rmt0 hdisk0 hdisk1


(Actual operations Screen Shot)

0:root@sactgx0005:/home/root # bootlist -m normal -o
hdisk0
0:root@sactgx0005:/home/root # ipl_varyon -i


PVNAME BOOT DEVICE PVID VOLUME GROUP ID
hdisk0 YES 00031523be6762d10000000000000000 00031523
00004c00
hdisk1 NO 00031523d36a9c5e0000000000000000 00031523
00004c00
hdisk2 NO 00031523f3bacf050000000000000000 00031523
f3badb67
hdisk3 NO 00031523f3baf1de0000000000000000 00031523
f3badb67
hdisk4 NO 00031523f3bb5b570000000000000000 00031523
f3bb694c
hdisk5 NO 00031523f3bb82350000000000000000 00031523
f3bb694c
0:root@sactgx0005:/home/root # bosboot -ad hdisk1

bosboot: Boot image is 19527 512 byte blocks.
0:root@sactgx0005:/home/root # bootlist -m normal -o
hdisk0
0:root@sactgx0005:/home/root # ipl_varyon -i


PVNAME BOOT DEVICE PVID VOLUME GROUP ID
hdisk0 YES 00031523be6762d10000000000000000 00031523
00004c00
hdisk1 YES 00031523d36a9c5e0000000000000000 00031523
00004c00
hdisk2 NO 00031523f3bacf050000000000000000 00031523
f3badb67
hdisk3 NO 00031523f3baf1de0000000000000000 00031523
f3badb67
hdisk4 NO 00031523f3bb5b570000000000000000 00031523
f3bb694c
hdisk5 NO 00031523f3bb82350000000000000000 00031523
f3bb694c

Clone rootdisk:
===================================================================


Other Useful Commands
===================================================================
lspv -m hdisk1 ; To see avaliable physical partitions on a disk

bootinfo -b ; to see the current boot device

ipl_varyon -i ; to see which disks are bootable

alt_disk_inst -C hdisk4
alt_disk_inst -C -B -O hdisk4 ; doesn't update the bootlist

bootinfo -K ; see what kernel
bootinfo -y ; see if 64 bit kernel is available


#bosboot -a -L
#lockstat -a

AIX Sybase ASE Performance Tuning

Thanks GOOGLE for making this page top 3 search result of "maxperm sybase ase".

Resolving Poor ASE Performance Due to AIX Default Virtual Memory Paging

ASE delivers its best performance when all of its memory resides in physical memory on the machine.
It ASE’s memory is paged out by the operating system’s virtual memory subsystem then ASE performance
can suffer dramatically.

Poor performance due to memory paging on AIX is often reported as problems with ASE’s checkpoint and
/ or housekeeper tasks. These tasks may be slow, appear hung, or encounter timeslice errors.
Transaction dumps may also be affected as ASE cannot properly execute a checkpoint.
Paging particularly affects these tasks because they often process long lists of memory.
If ASE’s memory has been paged out access to it may require a read from disk, resulting in
poor performance. Any other ASE task that must traverse long lists of memory pages may be similarly affected,
resulting in timeslice errors. Logical lock contention may also increase as tasks
which hold locks take longer to run.

While this is a potential problem on all platforms, certain characteristics of AIX make it more likely
to occur on that platform. The default configuration of the AIX kernel allows the file system cache
to consume up to 80% of the available physical memory pages. Depending on system demand this may result
in ASE memory pages being copied to the swap device. Sybase recommends tuning the AIX virtual memory
subsystem to avoid this scenario.

The AIX values minperm and maxperm loosely control the ratio of page frames used for files versus
those used for computational processes (such as ASE). Tuning these values requires determining
the physical memory load of processes running on the host machine. maxperm should then be set
so that file pages do not interfere with process pages.

For example, consider an AIX host that has 8 Gb of physical memory and hosts two ASE servers.
One ASE server is configured to use 3 Gb of max memory and the other is configured to use 2 Gb of max memory.
Other applications on the host require a total of 1 Gb of memory. Therefore the total memory
requirement is 6 Gb (3 Gb + 2 Gb + 1 Gb). As 75% of this host’s physical memory is needed
for applications (6 Gb out of 8 Gb), maxperm should be set no higher than 25%.

In addition to configuring maxperm, Sybase highly recommends setting strict_maxperm to 1. When strict_maxperm
is set to 0 (the default value), AIX may override the maxperm setting at its discretion. Setting strict_maxperm
to 1 informs AIX that this is a hard limit.


Kernel parameters:


Note: Value for tunable maxperm% must be greater than or equal to the value of tunable maxclient%

=======================
maxclient%

Purpose:
Specifies maximum percentage of RAM that can be used for caching client pages.
Similar to maxperm% but cannot be bigger than maxperm%.
Values:
o Default: 80
o Range: 1 to 100%.
o Type: Dynamic
Diagnosis:
If J2 file pages or NFS pages are causing working storage pages to get paged
out, maxclient can be reduced.
Tuning
Decrease the value of maxclient if paging out to paging space is occurring due
to too many J2 client pages or NFS client pages in memory. Increasing the
value can allow more J2 or NFS client pages to be in memory before page
replacement starts.

Refer To:
Miscellaneous I/O Tuning Parameters

========================

maxperm%

Purpose:
Specifies the point above which the page-stealing algorithm steals only file
pages.
Values:
o Default: total number of memory frames * 0.8
o Range: 1 to 100
o Type: Dynamic
Diagnosis:
Monitor disk I/O with iostat n.
Tuning
This value is expressed as a percentage of the total real-memory page frames
in the system. Reducing this value may reduce or eliminate page replacement of
working storage pages caused by high number of file page accesses. Increasing
this value may help NFS servers that are mostly read-only. For example, if
some files are known to be read repetitively, and I/O rates do not decrease
with time from startup, maxperm may be too low.
Refer To:
Tuning VMM Page Replacement with the vmtune Command

---------------------------------------------------------------------------------------
maxfree

Purpose:
Specifies the number of frames on the free list at which page-stealing is to
stop.
Values:
o Default: 128
o Range: 16 to 204800
o Type: Dynamic
Diagnosis:
Observe free-list-size changes with vmstat n.
Tuning
If vmstat n shows free-list size frequently driven below minfree by
application demands, increase maxfree to reduce calls to replenish the free
list. Generally, keep maxfree - minfree equal to or less than 100. Setting the
value too high causes page replacement to run for a longer period of time.
Value must be at least 8 greater than minfree

-------------------------------------------------------------------------------------

maxpin%

Purpose:
Specifies the maximum percentage of real memory that can be pinned.
Values:
o Default: 80 percent
o Range: 1 to 99
o Type: Dynamic
Diagnosis:
Cannot pin memory, although free memory is available.
Tuning
If this value is changed, the new value should ensure that at least 4 MB of
real memory will be left unpinned for use by the kernel. The maxpin values
must be greater than one and less than 100. Change this parameter only in
extreme situations, such as maximum-load benchmarking.

---------------------------------------------------------------------------------------


minfree

Purpose:
Specifies the minimum number of frames on the free list at which the VMM
starts to steal pages to replenish the free list.
Values:
o Default: maxfree - 8
o Range: 8 to 204800
o Type: Dynamic
Diagnosis:
vmstat n
Tuning
Page replacement occurs when the number of free frames reaches minfree. If
processes are being delayed by page stealing, increase minfree to improve
response time. The difference between minfree and maxfree should always be
equal to or greater than maxpgahead.


-----------------------------------------------------------------------------------------

strict_maxperm

Purpose:
If set to 1, the maxperm value will be a hard limit on how much of RAM can be
used as a persistent file cache.
Values:
o Default: 0 (off)
o Range: 0 or 1.
o Type: Dynamic
Diagnosis:
Excessive page outs to page space caused by too many file pages in RAM.
Tuning
Set to 1 in order to make the maxperm value a hard limit (use in conjunction
with the tuning of the maxperm parameter).
Refer To:
Placing a Hard Limit on Persistent File Cache with strict_maxperm

Hands-on examples:


#vmo –a ; display all

#vmo –D ; reset all to default value


594 vmo -p -o maxclient%=50 ; good for both current and reboot values
594 vmo -r -o maxclient%=50 ; good for reboot values
595 vmo -o maxclient%=50 ; maxperm% must be larger/equal to maxclient %
596 vmo -o maxperm%=50 ; good for now
597 vmo -r -o maxperm%=50 ; good for reboot
602 vmo -r -o strict_maxperm=1 ; good for reboot
603 vmo -o strict_maxperm=1 ; good for now
604 vmo –a


1. To list the current and reboot value, range, unit, type and dependencies of
all tunables parameters managed by the vmo command, type:
vmo -L

2. To turn on and reserve 16MB large pages on a POWER4 system, type:
vmo -r -o lgpg_regions=10 -o lgpg_size=16777216

This command will propose bosboot to the user, and warn that a reboot is
necessary before the change will be effective.
3. To display help on nokilluid, type:
vmo -h nokilluid

4. To turn on v_pinshm after the next reboot, type:
vmo -r -o v_pinshm=1

5. To permanently reset all vmo tunable parameters to default, type:
vmo -p -D

6. To list the reboot value for all virtual Memory Manager tuning parameters,
type:
vmo -r -a

7. To list (spreadsheet format) the current and reboot value, range, unit,
type and dependencies of all tunables parameters managed by the vmo
command, type:
vmo -x


AIX Kernel-VM-Tuning


See memory usage

svmon -G -i 1 2

svmon -P pid

Kernel Tuning in AIX 5L Version 5.2 Performance Tools Guide and Reference.


Performance Overview of the Virtual Memory Manager
(VMM) and Tuning VMM Page Replacement


vmo -a ; display
vmo -d ; set to default value
vmo -o ; display or set a tunable to new value


vmo -p ; When used in combination with -o, -d or -D, makes changes apply to both
current and reboot values, that is, turns on the updating of the
/etc/tunables/nextboot file in addition to the updating of the current value.
These combinations cannot be used on Reboot and Bosboot type parameters becasue
their current value can't be changed.

3:root@sactgx0020:/var/log/nmonlog # vmo -a
memory_frames = 4194304
pinnable_frames = 3947805
maxfree = 288
minfree = 256
minperm% = 20
minperm = 808874
maxperm% = 80
maxperm = 3235503
strict_maxperm = 0
maxpin% = 80
maxpin = 3355444
maxclient% = 80
lrubucket = 131072
defps = 1
nokilluid = 0
numpsblks = 6684672
npskill = 52224
npswarn = 208896
v_pinshm = 0
pta_balance_threshold = n/a
pagecoloring = n/a
framesets = 2
mempools = 1
lgpg_size = 0
lgpg_regions = 0
num_spec_dataseg = 0
spec_dataseg_int = 512
memory_affinity = 1
htabscale = n/a
force_relalias_lite = 0
relalias_percentage = 0
data_stagger_interval = 161
large_page_heap_size = 0
kernel_heap_psize = 4096
soft_min_lgpgs_vmpool = 0
vmm_fork_policy = 0
low_ps_handling = 1
mbuf_heap_psize = 4096
strict_maxclient = 1
cpu_scale_memp = 8
lru_poll_interval = 0
lru_file_repage = 1


1:root@sactgx0010:/home/root # vmo -L
NAME CUR DEF BOOT MIN MAX UNIT TYPE
DEPENDENCIES
--------------------------------------------------------------------------------
memory_frames 3840K 3840K 4KB pages S
--------------------------------------------------------------------------------
pinnable_frames 3644K 3644K 4KB pages S
--------------------------------------------------------------------------------
maxfree 128 128 128 16 200K 4KB pages D
minfree
memory_frames
--------------------------------------------------------------------------------
minfree 120 120 120 8 200K 4KB pages D
maxfree
memory_frames
--------------------------------------------------------------------------------
minperm% 20 20 20 1 100 % memory D
maxperm%
--------------------------------------------------------------------------------
minperm 757803 757803 S
--------------------------------------------------------------------------------
maxperm% 80 80 80 1 100 % memory D
minperm%
maxclient%
--------------------------------------------------------------------------------
maxperm 2960K 2960K S
--------------------------------------------------------------------------------
strict_maxperm 0 0 0 0 1 boolean D
--------------------------------------------------------------------------------
maxpin% 80 80 80 1 99 % memory D
pinnable_frames
memory_frames
--------------------------------------------------------------------------------
maxpin 3M 3M S
--------------------------------------------------------------------------------
maxclient% 80 80 80 1 100 % memory D
maxperm%
--------------------------------------------------------------------------------
lrubucket 128K 128K 128K 64K 4KB pages D
--------------------------------------------------------------------------------
defps 1 1 1 0 1 boolean D
--------------------------------------------------------------------------------
nokilluid 0 0 0 0 4G-1 uid D
--------------------------------------------------------------------------------
numpsblks 7808K 7808K 4KB pages S
--------------------------------------------------------------------------------
npskill 61K 61K 61K 1 7M-1 4KB pages D
--------------------------------------------------------------------------------
npswarn 244K 244K 244K 0 7M-1 4KB pages D
--------------------------------------------------------------------------------
v_pinshm 0 0 0 0 1 boolean D
--------------------------------------------------------------------------------
pta_balance_threshold n/a 50 50 0 99 % pta segment R
--------------------------------------------------------------------------------
pagecoloring n/a 0 0 0 1 boolean B
--------------------------------------------------------------------------------
framesets 2 2 2 1 10 B
--------------------------------------------------------------------------------
mempools 1 1 1 1 4 B
--------------------------------------------------------------------------------
lgpg_size 0 0 0 0 256M bytes B
lgpg_regions
--------------------------------------------------------------------------------
lgpg_regions 0 0 0 0 B
lgpg_size
--------------------------------------------------------------------------------
num_spec_dataseg 0 0 0 0 B
--------------------------------------------------------------------------------
spec_dataseg_int 512 512 512 0 B
--------------------------------------------------------------------------------
memory_affinity 1 1 1 0 1 boolean B
--------------------------------------------------------------------------------
htabscale n/a -1 -1 -4 0 B
--------------------------------------------------------------------------------
force_relalias_lite 0 0 0 0 1 boolean D
--------------------------------------------------------------------------------
relalias_percentage 0 0 0 0 32K-1 D
--------------------------------------------------------------------------------
data_stagger_interval 161 161 161 0 0 4KB pages D
lgpg_size
--------------------------------------------------------------------------------
large_page_heap_size 0 0 0 0 8E-1 bytes B
lgpg_size
--------------------------------------------------------------------------------
kernel_heap_psize 4K 4K 4K 4K 16M bytes B
lgpg_size
--------------------------------------------------------------------------------
soft_min_lgpgs_vmpool 0 0 0 0 90 % D
lgpg_size
--------------------------------------------------------------------------------
vmm_fork_policy 0 0 0 0 1 boolean D
--------------------------------------------------------------------------------
low_ps_handling 1 1 1 1 2 D
--------------------------------------------------------------------------------
mbuf_heap_psize 4K 4K 4K 4K 16M bytes B
--------------------------------------------------------------------------------
strict_maxclient 1 1 1 0 1 boolean D
--------------------------------------------------------------------------------
cpu_scale_memp 8 8 8 1 64 B
--------------------------------------------------------------------------------
lru_poll_interval 0 0 0 0 60000 milliseconds D
--------------------------------------------------------------------------------
lru_file_repage 1 1 1 0 1 boolean D
--------------------------------------------------------------------------------

n/a means parameter not supported by the current platform or kernel

Parameter types:
S = Static: cannot be changed
D = Dynamic: can be freely changed
B = Bosboot: can only be changed using bosboot and reboot
R = Reboot: can only be changed during reboot
C = Connect: changes are only effective for future socket connections
M = Mount: changes are only effective for future mountings
I = Incremental: can only be incremented

Value conventions:
K = Kilo: 2^10 G = Giga: 2^30 P = Peta: 2^50
M = Mega: 2^20 T = Tera: 2^40 E = Exa: 2^60
AIX Checkpoints


A general 10-point checklist for new build AIX servers.
Actual check-point and values may vary. This is just a reference.

Quick Checkpoint:
1. Adjust paging size;
2. Configure NIC/etherchannel;
3. Update /etc/security/limits;
4. Check/configure the dump devices;
5. Create a shutdown wrapper;
6. Setup/modify sudo privilege;
7. Install additional packages (SAN, EMC, HDS, etc.)
8. Setup NIS client (if required)
9. Mirror rootvg and verify rootvg mirroring
10. Fine tune kernel memory settings (vmo)


1. Increase paging space size as appropriate:
# mkps –a –n –sXX rootvg

Update the system settings:
# chdev -l aio0 -a minservers='250' -a maxservers='500'
# chdev -l aio0 -a maxreqs=8192 –a autoconfig='available'
# chdev -l sys0 -a cpuguard=enable -a autorestart=true
# chdev -l sys0 -a iostat=true
# chdev -l sys0 -a maxuproc=500

2. Configure NIC adapter and create etherchannel:
Remove and recreate the interface used to build the OS:
# ifconfig enX down detach
# rmdev –dl enX
# cfgmgr -v

Check each NIC adapter's media speed:
# lsdev -Cc adapter | awk '{print $1}' | grep ent | while read i
do
echo "################## $i"
lsattr -El $i -a media_speed
done

Update each NIC adapter's media speed as necessary:
# chdev -l entX -a media_speed=100_Full_Duplex
(For Gigabit Ethernet, use auto_negotiation)

Create the etherchannel interface which should look like:
EtherChannel / Link Aggregation: ent8
Status: Available
Attributes:
adapter_names ent4 EtherChannel Adapters
alt_addr 0x000000000000 Alternate EtherChannel Address
auto_recovery yes Enable automatic recovery after failover
backup_adapter ent6 Adapter used when whole channel fails
hash_mode default Determines how outgoing adapter is chosen
mode standard EtherChannel mode of operation
netaddr 10.150.144.129 Address to ping
noloss_failover yes Enable lossless failover after ping failure
num_retries 2 Times to retry ping before failing
retry_time 5 Wait time (in seconds) between pings
use_alt_addr no Enable Alternate EtherChannel Address
use_jumbo_frame no Enable Gigabit Ethernet Jumbo Frames

Use the etherchannel to set up the server's public network connectivity

3. Update /etc/security/limits:
default:
fsize = -1
core = 2097151
cpu = -1
data = -1
rss = -1
stack = -1
nofiles = 2000

4. Configure the dump device:
# sysdumpdev –K
# sysdumpdev –C
# sysdumpdev -Pp /dev/sysdumpnull
# rmlv hd7
# mklv -y hd7 -a im -t sysdump rootvg 16 <== 4G based on 256 MB PP size # sysdumpdev -Pp /dev/hd7 5. Create the /etc/rc.shutdown script: ##################### Beginning of rc.shutdown ##################### if [ -r /tmp/allowshutdown ];then rm -f /tmp/allowshutdown ps -ef | grep "/opt/VRTSvcs/bin/had" | grep -v grep > /dev/null
if [ $? -eq 0 ];then
echo
echo "WARNING: VCS should be stopped before shutdown is run"
echo
exit 1
fi

echo "Running /etc/rc.shutdown, please wait...."
exec 1>/tmp/shutdown.log 2>&1
date

#
# Add the processes to be shut down in background here
#
# sleep 120

else
echo
banner `hostname`
echo
echo "WARNING: If you really want to shutdown this system"
echo " you must create the file /tmp/allowshutdown"
echo
exit 1
fi
######################## End of rc.shutdown ########################

# chmod 700 /etc/rc.shutdown


6. Setup sudo: edit /etc/sudoers for proper setting


7. Install EMC (optional)
# Install EMC Software and License Key
echo "PP_LPAR_KEY_FIX=1" >> /etc/environment

Install EMC ODM definitions:
# cd /emc_package_home
# installp -agXd. EMC

Install EMC PowerPath:
# installp -agXd. EMCpower

Add EMC PowerPath license key:
# emcpreg -add wxyz-wxyz-wxyz-wxyz-wxyz-wxyz

Install Solution Enabler:
# installp -agXd. EMCsymm


Config sendmail for security

Reboot:
# touch /tmp/allowshutdown
# shsutdown -rF

Add the appropriate netgroups to /etc/passwd

Create the /etc/no_shell file:

##################### Beginning of /etc/no_shell #####################
#!/bin/sh
/bin/cat 1>&2 <> /etc/passwd


8. Setup NIS client and Test NIS:

Add the following entry to /etc/environment:
# echo "YPBIND_MAXWAIT=10" >> /etc/environment

Create ypservers from list:


Change the domain name:
(For PROD/DR servers)
# /usr/sbin/chypdom -B prod.us.db.com
(For DEV/UAT servers)
# /usr/sbin/chypdom -B dev.us.db.com

This command updates /etc/rc.nfs:
if [ -x /usr/bin/domainname ]; then
/usr/bin/domainname
fi

Start ypbind:
# /usr/sbin/mkclient -B -S

This command updates /etc/rc.nfs:
if [ -x /usr/lib/netsvc/yp/ypbind ]; then
start ypbind /usr/lib/netsvc/yp/ypbind -ypsetme
/usr/sbin/ypset
fi

Verify that ypbind is running:
# ps -ef | grep ypbind
# ypwhich
# ypwhich -m
# ypcat passwd

Append the following line to /etc/group for NIS group access:
# echo "+:" >> /etc/group

Update host resolution order (if needed):
/etc/netsvc.conf --> hosts=local,bind - OR -
NSORDER=local,bind;export NSORDER
(Default is bind,nis,local)

9. Mirror rootvg
# mirrorvg –S rootvg
# bosboot -ad /dev/ipldevice
# bootlist -m normal hdisk0 hdisk1


10.Tune VMM (vmo, ioo)
vmo -a
vmo -o
For Sybase ASE servers on AIX 5.xL, to ensure the best performance on Sybase, set the following parameters:
maxperf% = 25% (default is 80%)
strict_maxperf = 1

For details on vmo and database performance issue, please refer to this blog article.

AIX Breaking Root Disk Mirrors for OS Upgrade

Before performing any OS patching, it is common practice to break the root disk mirrors. One mirror is used to perform the patching and the second mirror is saved for fail back purposes. This note describes a procedure to break root disk for AIX OS upgrade. This procedure was tested successfully on AIX 5.3 TL7 but should work on all AIX 5.3+ technology levels.

Note:
1. Do a mksysb backup before patching to provide an alternative method of rebuilding the OS from the NIM server using mksysb copy.
2. The following example assumes that the rootvg contains mirrored copies of LVs on hdisk0 and hdisk1.

###
### Step 1: Save the system configuration and break the root mirrors
###
Capture and save outputs from the following commands:
# lspv
# lsvg
# lsvg -o
# lsvg -l `lsvg -o`
# lsvg -p `lsvg -o`
# bootlist -m normal -o

Export all non-rootvg volume groups
Extract the major and minor number of the disk the system was booted from:

# ls -al /dev/ipldevice
crw------- 2 root system 22, 9 Feb 10 11:15 /dev/ipldevice

Confirm the disk the system was booted from:
# ls -al /dev | grep "22, 9"
brw------- 1 root system 22, 9 Feb 11 15:50 hdisk0
crw------- 2 root system 22, 9 Feb 10 11:15 ipldevice
crw------- 2 root system 22, 9 Feb 10 11:15 rhdisk0

Check the current bootlist:
# bootlist -m normal -o
hdisk0 blv=hd5
hdisk1 blv=hd5

Remove LV mirrored copies from hdisk1:
# unmirrorvg rootvg hdisk1

Remove the boot block from hdisk1:
# chpv -c hdisk1

Remove hdisk1 from rootvg:
# reducevg rootvg hdisk1

If you see the following error:
0516-016 ldeletepv: Cannot delete physical volume with allocated
partitions. Use either migratepv to move the partitions or
reducevg with the -d option to delete the partitions.
0516-884 reducevg: Unable to remove physical volume hdisk1
some LVs are present only in hdisk1 and have not been mirrored.

Migrate them to hdisk0 and then remove hdisk1 from rootvg:
# migratepv hdisk1 hdisk0
# reducevg rootvg hdisk1

Confirm that hdisk1 has been removed from rootvg:
# lsvg -p rootvg
rootvg:
PV_NAME PV STATE TOTAL PPs FREE PPs FREE DISTRIBUTION
hdisk0 active 546 250 107..87..22..00..34


###
### Step 2: Create the alternate boot disk
###
Create the alternate boot disk on hdisk1:
# alt_disk_copy -d hdisk1
Check the volume groups:
# lsvg
rootvg
altinst_rootvg <= altinst_rootvg contains rootvg on hdisk1

# lsvg -o
rootvg <= altinst_rootvg is varied off

The boot list should now point to the alternate disk only:
# bootlist -m normal -o
hdisk1 blv=hd5


###
### Step 3: Boot from the alternate boot disk (hdisk1)
###
Reboot:
# shutdown -rF
Verify that the system was booted from the alternate boot disk (hdisk1):
# ls -al /dev/ipldevice
crw------- 2 root system 22, 1 Feb 20 15:50 /dev/ipldevice

# ls -al /dev | grep "22, 1"
brw------- 1 root system 22, 1 Feb 20 16:07 hdisk1
crw------- 2 root system 22, 1 Feb 20 15:50 ipldevice
crw------- 2 root system 22, 1 Feb 20 15:50 rhdisk1

Check the volume groups:
# lsvg
rootvg
old_rootvg <= old_rootvg contains rootvg on hdisk0

# lsvg -o
rootvg <= old_rootvg is varied off
Change the boot list to point to the original boot disk only:
# bootlist -m normal hdisk0
# bootlist -m normal -o
hdisk0 blv=hd5

###
### Step 4: Boot from the original boot disk (hdisk0)
###
Reboot:
# shutdown -rF
Confirm that the system was booted from the original boot disk (hdisk0):
# ls -al /dev/ipldevice
crw------- 2 root system 22, 9 Feb 10 11:15 /dev/ipldevice
# ls -al /dev | grep "22, 9"
brw------- 1 root system 22, 9 Feb 11 15:50 hdisk0
crw------- 2 root system 22, 9 Feb 10 11:15 ipldevice
crw------- 2 root system 22, 9 Feb 10 11:15 rhdisk0

Proceed with the OS upgrade

###
### Step 5: If the upgrade is successful
###
Remove the alternate boot disk:
# exportvg alinst_rootvg

Remove the boot block from hdisk1:
# chpv -c hdisk1

Add hdisk1 to rootvg:
# extendvg -f rootvg hdisk1

Reestablish root mirroring:
# mirrorvg -S rootvg

Update the boot list:
# bootlist -m normal hdisk0 hdisk1

Rebuild the boot volume:
# bosboot -ad /dev/ipldevice
Import non-rootvg volume groups

###
### Step 6:
### If the upgrade is unsuccessful, boot from the alternate boot disk
### to failback to the OS before the upgrade
###
Update the boot list to point to the alternate boot disk:
# bootlist -m normal hdisk1
# bootlist -m normal -o
hdisk1 blv=hd5

Reboot:
# shutdown -rF
Check the volume groups:
# lsvg
rootvg
old_rootvg <= old_rootvg contains rootvg on hdisk0

# lsvg -o
rootvg <= old_rootvg is varied off

Remove old_rootvg permanently:
# alt_rootvg_op -X old_rootvg - OR -
# alt_disk_install -X old_rootvg

Add hdisk0 to rootvg and reestablish root mirroring
Import non-rootvg volume groups

AIX Boot Related Administration Notes (1)

AIX Boot Related Administration Notes

RAMFS:

RAMFS files are accessed using a prefix of /../, eg. rc.boot uses /../usr/sbin/fsck to find fsck.

Mount root out onto /mnt, or you will be unable to access the RAMFS files.

;To see the last boot device

#bootinfo -b

;To see all boot process related messages

#alog -t boot -o

Multi-user initialization completed

ot: executing "copycore"

Changed: tty

Changed: ipldevice

Changed: IPL_rootvg

mergedev replaced 3 files in the hardfile /dev directory

rc.boot: run time mount of /var

rc.boot: run time mount of /tmp

rc.boot: checking free space in /tmp

rc.boot: executing "strload"

rc.boot: allow 64-bit apps

rc.boot: executing "cfglivedump -c"

rc.boot: executing "cfgmgr"

cfgmgr is running in phase 2

----------------

Time: 0 LEDS: 0x538

Invoking top level program -- "/etc/methods/cfgprobe -c /etc/drivers/coreprobe.e

xt"

Time: 0 LEDS: 0x539

Return code = 0

*** no stdout ****

*** no stderr ****

----------------

stdin

;Each fs has two superblocks at 1 and 31.

;To copy the superblock from block 31 to block 1

# dd count=1 bs=4k skip=31 seek=1 if=/dev/hd4 of=/dev/hd4

;To unlock rootvg

#chvg -u rootvg

E1F1 is the led that indicates that a system is looking for a boot devices list in the NVRAM. Please follow the procedurebelow in order to start your system in maintenance mode and then recreate the boot list:

Booting in Service Mode

This document describes how to boot the system into Service mode (also known as Maintenance mode) to install the machine,restore an operating system backup, or perform maintenance on the rootvg volume group.

The information in this document applies to AIX Versions 3.x, 4.x and 5.x.

Booting PCI-based systems into Service mode

PCI machine-specific information

Accessing rootvg and mounting file systems

Related documentation

Booting PCI-based systems into Service mode

When booting a PowerPC into Service mode, cd0 or rmt0 must be before the hdisk in the bootlist. If not, change the bootlist

at boot time. On some models, you can set the machine to use a default bootlist that includes both cd0 and rmt0. If a bootable CD or tape is in the CD-ROM or tape drive, the machine will boot from this device.

For most of the newer PCI-based models, selecting the default bootlist, with a bootable tape or CD loaded in the machine, causes the system to automatically boot from that device. Generally, the next menu on the screen asks the administrator

to define the system console.

For all machines discussed here, if you are using a graphical terminal, you will use a function key such as F5. If you are using an ASCII terminal, use an equivalent number key such as 5. Use the numbers across the top of the keyboard, not thenumbers on the numeric keypad. On ASCII terminals, the icons may not be displayed on the screen; the number can be pressedbetween the second and third beeps, the second beep being a series of three clicks.

PCI machine-specific information

The following systems all use the F5 or 5 key to read from the default boot list, which is written into the system firmware:

MODEL 7017 7024 7025 7026 7043 7137

-------------- ------- ------- ------- ------- ------- -------

TYPE S70 E20 F30 H10 43P-140 F3L

S7A E30 F40 H50 43P-150

S80 F50 H70 43P-240

B80 43P-260

On these machines, use 5 (on the keyboard, not the keypad) if you are using an ASCII terminal. On a locally attached graphics console, use the F5 function key. The F5 or 5 key must be pressed just after the keyboard icon or message is displayed on the console. If you have either a 7026-M80, 7026-H80 or a 7025-F80, then the 5 key will be the default whether you have an ascii or graphics console.

The following systems use the F1 key to enter System Management Services mode (SMS):

MODEL 6040 7042 7247 7249

------- ------- ------- ------- -------

TYPE 620 850 82x 860

You should be in an Easy-Setup menu. Select the Start Up menu. Clear the current bootlist settings and then select the CD-ROM for choice 1 and hdd (the hard disk) for choice 2. Select OK. Insert the CD-ROM and select the EXIT icon. The machine should now boot from the CD-ROM.

The following systems use the F2 key to enter SMS:

MODEL 6015 6050 6070 7020 7248

------- ------- ------- ------- ------- -------

TYPE 440 830 850 40P 43P

Select Select Boot Device from the initial menu on the screen, and then select Restore Default Settings from the list. Press the Esc key to exit all the menus, and then reboot the machine. The system should boot from your bootable media.

For information on accessing the rootvg volume group, see the next section in this document.

Accessing rootvg and mounting file systems For AIX Versions 4 and 5, choose Start Maintenance Mode for System Recovery , option 3. The next screen will be called Maintenance; select option 1, Access a Root Volume Group. At the next screen, type 0 to continue, and select the appropriate volume group by typing the number next to it. A screen like the following will display.

Example:

Access a Root Volume Group

Type the number for a volume group to display the logical volume information and press Enter.

1) Volume Group 0073656f2608e46a contains these disks:

hdisk0 2063 04-C0-00-4,0

Once a volume group has been selected, information will be displayed about that volume group.

Example:

Volume Group Information

------------------------------------------------------------------------------

Volume Group ID 0073656f2608e46a includes the following logical volumes:

hd6 hd5 hd8 hd4 hd2 hd9var

hd3 hd1

------------------------------------------------------------------------------

Type the number of your choice and press Enter.

1) Access this Volume Group and start a shell

2) Access this Volume Group and start a shell before mounting filesystems

99) Previous Menu

If the logical volumes listed do not include logical volumes like hd4, hd2, hd3, and so on, you may have selected the wrong volume group. Press 99 to back up one screen and select again.

Now you may select one of two options: Access this volume group and start a shell , option 1, or Access this volume group and start a shell before mounting file systems , option 2. Option 2 allows you to perform file system maintenance on /, /usr, /tmp, and /var before mounting them.

NOTE: If you intend to use SMIT or vi, set your terminal type in preparation for editing the file. xxx stands for a terminal

type such as lft, ibm3151, or vt100.

TERM=

export TERM

Errors from these steps may indicate failed or corrupt disks in rootvg. These problems should be corrected. For additional assistance, contact your vendor, your local branch office, or your AIX support center.

Related documentation

For more in-depth coverage of this subject, the following IBM publication is recommended:

AIX Version 4.3 System Management Guide: Operating System and Devices

AIX Version 5.1 System Management Guide: Operating System and Devices

IBM documentation can also be accessed online through the following URL:

http://www.rs6000.ibm.com/resource/aix_resource/Pubs/index.html

Similar documents can be accessed through the following URL:

http://techsupport.services.ibm.com/server/support?view=pSeries

Once you have a valid prompt, you can recreate the boot device list (it's supposed you already know the hdisk number from which AIX starts, let's supposed it's hdisk0

bootlist -m normal hdisk0

If ths action does not work, repeat the procedure and issue

bosboot -ad /dev/ipldevice

Just before the bootlist command

Accessing Database with Perl DBI

The best book to read for this subject is "Programming the Perl DBI".

#1. Install Perl DBI::DBD module
(You may need to remove any installed older versions of perl-DBI-mysql package)

Several ways to install Perl modules.
1. Download source and compile;
2. Use perl -MCPAN -e 'install DBD::mysql';
3. Use 'cpan';

For more details about installing Perl modules, please visit here.


I pick 3, use cpan.


cpan DBI
cpan DBD::mysql

(sample run of cpan File::HomeDir)
[root@ipc4 ~]# cpan File::HomeDir
CPAN: Storable loaded ok
Going to read /home/shan/perl/.cpan/Metadata
Database was generated on Tue, 15 Dec 2009 22:06:58 GMT
Running install for module File::HomeDir
Running make for A/AD/ADAMK/File-HomeDir-0.88.tar.gz
CPAN: LWP::UserAgent loaded ok
Fetching with LWP:
ftp://cpan-du.viaverio.com/pub/CPAN/authors/id/A/AD/ADAMK/File-HomeDir-0.88.tar.gz
CPAN: Digest::MD5 loaded ok
Fetching with LWP:
ftp://cpan-du.viaverio.com/pub/CPAN/authors/id/A/AD/ADAMK/CHECKSUMS
Checksum for /home/shan/perl/.cpan/sources/authors/id/A/AD/ADAMK/File-HomeDir-0.88.tar.gz ok
Scanning cache /home/shan/perl/.cpan/build for sizes
File-HomeDir-0.88/
...
CPAN.pm: Going to build A/AD/ADAMK/File-HomeDir-0.88.tar.gz

Checking if your kit is complete...
Looks good
...
Appending installation info to /usr/lib/perl5/5.8.5/i386-linux-thread-multi/perllocal.pod
/usr/bin/make install -- OK


#2. Use instmodsh utility to manage installed modules
(if instmodsh doesn't show all installed modules, use perldoc perllocal or check perllocal file directly to see the installed modules)

root@drbl-01 DBD-mysql-4.010]# instmodsh
Available commands are:
l – List all installed modules
m – Select a module
q – Quit the program
cmd? l
Installed modules are:
CGI
Cwd
DBD::mysql
DBI
ExtUtils::MakeMaker
FCGI
File::HomeDir
HTML::Parser
IO
Perl
Test::Simple
mod_perl2


cmd? m DBI
Available commands are:
f [all|prog|doc] - List installed files of a given type
d [all|prog|doc] - List the directories used by a module
v - Validate the .packlist - check for missing files
t - Create a tar archive of the module
q - Quit the module

DBI cmd?
Available commands are:
f [all|prog|doc] - List installed files of a given type
d [all|prog|doc] - List the directories used by a module
v - Validate the .packlist - check for missing files
t - Create a tar archive of the module
q - Quit the module
DBI cmd? d
all directories in DBI are:
/usr/bin
/usr/lib/perl5/site_perl/5.8.5/i386-linux-thread-multi
/usr/lib/perl5/site_perl/5.8.5/i386-linux-thread-multi/Bundle
/usr/lib/perl5/site_perl/5.8.5/i386-linux-thread-multi/DBD
/usr/lib/perl5/site_perl/5.8.5/i386-linux-thread-multi/DBD/Gofer/Policy
/usr/lib/perl5/site_perl/5.8.5/i386-linux-thread-multi/DBD/Gofer/Transport
/usr/lib/perl5/site_perl/5.8.5/i386-linux-thread-multi/DBI
/usr/lib/perl5/site_perl/5.8.5/i386-linux-thread-multi/DBI/Const
/usr/lib/perl5/site_perl/5.8.5/i386-linux-thread-multi/DBI/Const/GetInfo
/usr/lib/perl5/site_perl/5.8.5/i386-linux-thread-multi/DBI/DBD
/usr/lib/perl5/site_perl/5.8.5/i386-linux-thread-multi/DBI/Gofer
/usr/lib/perl5/site_perl/5.8.5/i386-linux-thread-multi/DBI/Gofer/Serializer
/usr/lib/perl5/site_perl/5.8.5/i386-linux-thread-multi/DBI/Gofer/Transport
/usr/lib/perl5/site_perl/5.8.5/i386-linux-thread-multi/DBI/ProfileDumper
/usr/lib/perl5/site_perl/5.8.5/i386-linux-thread-multi/DBI/SQL
/usr/lib/perl5/site_perl/5.8.5/i386-linux-thread-multi/DBI/Util
/usr/lib/perl5/site_perl/5.8.5/i386-linux-thread-multi/Win32
/usr/lib/perl5/site_perl/5.8.5/i386-linux-thread-multi/auto/DBI
/usr/share/man/man1
/usr/share/man/man3

You can us 't' command to create a tarball to install modules on those same arch servers that don't have access to the Internet directly (e.g. behind firewall).


#3. Grant user privilege to access database
[root@ipc4 perl]# mysql -u root -p
mysql > grant all privileges on database-name.* to 'user'@'localhost' identified by 'password';


#4. Create a testing database with two tables

[shan@ipc4 ~]$ mysql -u root -p
Enter password:
Welcome to the MySQL monitor. Commands end with ; or \g.
Your MySQL connection id is 94
Server version: 5.1.39-community MySQL Community Server (GPL)

Type 'help;' or '\h' for help. Type '\c' to clear the current input statement.

mysql> create database bestbuy;
Query OK, 1 row affected (0.00 sec)

mysql> use bestbuy;
Database changed

mysql> create table location(loc_id integer,
-> name varchar(50),
-> address varchar(60),
-> city varchar(20),
-> state char(2),
-> zipcode char(5));
Query OK, 0 rows affected (0.07 sec)


mysql> create table purchase
-> (item_id integer not null,
-> item_name varchar(30) not null,
-> purchase_date datetime,
-> loc_id integer,
-> unit_price decimal(8,2),
-> quantity decimal(6,2),
-> amount decimal(8,2),
-> comment varchar(100));
Query OK, 0 rows affected (0.06 sec)

mysql> insert into location(loc_id,name,city,state) values(1,'BestBuy','Pasadena','CA');
Query OK, 1 row affected (0.01 sec)

mysql> insert into location(loc_id,name,city,state) values(1,'BestBuy','Duarte','CA');
Query OK, 1 row affected (0.00 sec)

mysql> insert into location(loc_id,name,city,state) values(1,'BestBuy','Sierra Madre','CA');
Query OK, 1 row affected (0.00 sec)


mysql> describe purchase;
+---------------+--------------+------+-----+---------+-------+
| Field | Type | Null | Key | Default | Extra |
+---------------+--------------+------+-----+---------+-------+
| item_id | int(11) | NO | | NULL | |
| item_name | varchar(30) | NO | | NULL | |
| purchase_date | datetime | YES | | NULL | |
| loc_id | int(11) | YES | | NULL | |
| unit_price | decimal(8,2) | YES | | NULL | |
| quantity | decimal(6,2) | YES | | NULL | |
| amount | decimal(8,2) | YES | | NULL | |
| comment | varchar(100) | YES | | NULL | |
+---------------+--------------+------+-----+---------+-------+
8 rows in set (0.00 sec)


mysql> insert into purchase(item_id,item_name,purchase_date,loc_id,unit_price,quantity,amount,comment)
-> values(1,'Nitendo DJHero','2009-12-15 19:15:00',1,100,1,108,'Prepare for a DJ job at a LA club.');
Query OK, 1 row affected (0.00 sec)

mysql> insert into purchase(item_id,item_name,purchase_date,loc_id,unit_price,quantity,amount,comment) values(1,'Nitendo Wii','2009-12-15 19:15:00',1,199,1,218,'Prepare for a DJ job at a LA club.');
Query OK, 1 row affected (0.00 sec)

mysql> insert into purchase(item_id,item_name,purchase_date,loc_id,unit_price,quantity,amount,comment) values(1,'MacBookPro','2009-12-15 19:15:00',1,1699,1,1810,'Prepare for a DJ job at a LA club.');
Query OK, 1 row affected (0.00 sec)

mysql> insert into purchase(item_id,item_name,purchase_date,loc_id,unit_price,quantity,amount,comment) values(2,'Samsung LN55B650','2009-12-15 19:15:00',1,199,1,2150,'Prepare for a DJ job at a LA club.');
Query OK, 1 row affected (0.00 sec)

mysql> insert into purchase(item_id,item_name,purchase_date,loc_id,unit_price,quantity,amount,comment) values(3,'Samsung LN55iB8000','2009-12-15 19:15:00',1,1999,1,2150,'Prepare for a DJ job at a LA club.');
Query OK, 1 row affected (0.00 sec)

mysql> select * from location;
+--------+---------+---------+--------------+-------+---------+
| loc_id | name | address | city | state | zipcode |
+--------+---------+---------+--------------+-------+---------+
| 1 | BestBuy | NULL | Pasadena | CA | NULL |
| 1 | BestBuy | NULL | Duarte | CA | NULL |
| 1 | BestBuy | NULL | Sierra Madre | CA | NULL |
+--------+---------+---------+--------------+-------+---------+
3 rows in set (0.00 sec)


mysql> select * from purchase;
+---------+--------------------+---------------------+--------+------------+----------+---------+------------------------------------+
| item_id | item_name | purchase_date | loc_id | unit_price | quantity | amount | comment |
+---------+--------------------+---------------------+--------+------------+----------+---------+------------------------------------+
| 1 | Nitendo DJHero | 2009-12-15 19:15:00 | 1 | 100.00 | 1.00 | 108.00 | Prepare for a DJ job at a LA club. |
| 1 | Nitendo Wii | 2009-12-15 19:15:00 | 1 | 199.00 | 1.00 | 218.00 | Prepare for a DJ job at a LA club. |
| 1 | MacBookPro | 2009-12-15 19:15:00 | 1 | 1699.00 | 1.00 | 1810.00 | Prepare for a DJ job at a LA club. |
| 2 | Samsung LN55B650 | 2009-12-15 19:15:00 | 1 | 199.00 | 1.00 | 2150.00 | Prepare for a DJ job at a LA club. |
| 3 | Samsung LN55iB8000 | 2009-12-15 19:15:00 | 1 | 1999.00 | 1.00 | 2150.00 | Prepare for a DJ job at a LA club. |
+---------+--------------------+---------------------+--------+------------+----------+---------+------------------------------------+
5 rows in set (0.00 sec)


mysql> select item_id,item_name,purchase_date,loc_id,amount from purchase;
+---------+--------------------+---------------------+--------+---------+
| item_id | item_name | purchase_date | loc_id | amount |
+---------+--------------------+---------------------+--------+---------+
| 1 | Nitendo DJHero | 2009-12-15 19:15:00 | 1 | 108.00 |
| 1 | Nitendo Wii | 2009-12-15 19:15:00 | 1 | 218.00 |
| 1 | MacBookPro | 2009-12-15 19:15:00 | 1 | 1810.00 |
| 2 | Samsung LN55B650 | 2009-12-15 19:15:00 | 1 | 2150.00 |
| 3 | Samsung LN55iB8000 | 2009-12-15 19:15:00 | 1 | 2150.00 |
+---------+--------------------+---------------------+--------+---------+
5 rows in set (0.00 sec)


#5. Use Perl's DBI::mysql to modify and query the database
1 #!/usr/bin/perl -w
2
3 use DBI;
4
5 ## mysql user database name
6 $db ="bestbuy";
7
8 ## mysql database user name
9 $user = "shan";
10
11 ## mysql database password
12 $pass = "newyork1";
13
14 ## user hostname : This should be "localhost" but it can be diffrent too
15 $host="localhost";
16
17 # Get database handle
18 $dbh = DBI->connect("DBI:mysql:$db:$host", $user, $pass, {RaiseError=>1});
19
20 # 1. Use $dbh->do method to perform sql modification type operations
21
22 $results = $dbh->do(q{insert into purchase(item_id,item_name,purchase_date,loc_id,unit_price,quantity,amount,comment)
23 values(1,'SONY Laptop','2009-11-27 5:30:00',1,359,1,375,'Black Friday Bloody Reward')});
24 die "Unable to perform insert:$DBI::errstr\n" unless (defined $results);
25
26
27
28 # 2. Use $dbh->prepare/$dhb->execute methods to perform query type operations
29
30 $sth = $dbh->prepare(q{select * from purchase})
31
32 or die "Unable to prep our query:".$dbh->errstr."\n";
33
34 # sth is a statement handle retured by method prepare , DBI::st=HASH(0x8f7fbc4)->fetchrow_array()
35 my $rv = $sth->execute
36 or die "Unable to execute our query:".$dbh-errstr."\n";
37
38
39 # Output 2
40 print "The output of prepare-execute method sQL operation:\n";
41
42 while ( @row2 = $sth->fetchrow_array () ) {
43 my $temp2 = join "\t", @row2;
44 print " $temp2 \n";
45 }


Execution :
The above script insert record "SONY Laptop" and shows all records in purchase database.


[shan@ipc4 perl]$ perl bestbuy.pl
The output of prepare-execute method sQL operation:
1 Nitendo DJHero 2009-12-15 19:15:00 1 100.00 1.00 108.00 Prepare for a DJ job at a LA club.
1 Nitendo Wii 2009-12-15 19:15:00 1 199.00 1.00 218.00 Prepare for a DJ job at a LA club.
1 MacBookPro 2009-12-15 19:15:00 1 1699.00 1.00 1810.00 Prepare for a DJ job at a LA club.
2 Samsung LN55B650 2009-12-15 19:15:00 1 199.00 1.00 2150.00 Prepare for a DJ job at a LA club.
3 Samsung LN55iB8000 2009-12-15 19:15:00 1 1999.00 1.00 2150.00 Prepare for a DJ job at a LA club.
1 SONY Laptop 2009-11-27 05:30:00 1 359.00 1.00 375.00 Black Friday Bloody Reward


Useful Hint for DBAs:
Tired of re-typing a long SQL command after making a typo?
Add the following line in your home directory's .inputrc file, you will be able to use vi style editing mode inside mysql shell.
e.g. ESC k to recall the last command you typed, or ESC j to travel down the command line history .. cheers!

set editing-mode vi


#6.Troubleshooting:

#a. My initial (failed) installation of DBD::mysql
#cpan DBD::mysql

Cannot find the file 'mysql_config'! Your execution PATH doesn't seem
not contain the path to mysql_config. Resorting to guessed values!
Can't exec "mysql_config": No such file or directory at Makefile.PL line 464.
Can't find mysql_config. Use --mysql_config option to specify where mysql_config is located
Can't exec "mysql_config": No such file or directory at Makefile.PL line 464.
Can't find mysql_config. Use --mysql_config option to specify where mysql_config is located
Can't exec "mysql_config": No such file or directory at Makefile.PL line 464.
Can't find mysql_config. Use --mysql_config option to specify where mysql_config is located


#b. The root cause is it needs a file mysql_config which comes with MySQL-devel-community-5.x.x-0.rhel4.

Download it,

[shan@ipc4 rpm]$wget http://opensource.become.com/mysql/Downloads/MySQL-5.4/MySQL-devel-community-5.4.3-0.rhel4.i386.rpm
Or use curl,
[shan@ipc4 rpm]$curl http://opensource.become.com/mysql/Downloads/MySQL-5.4/MySQL-devel-community-5.4.3-0.rhel4.i386.rpm -o MySQL-devel-community-5.4.3-0.rhel4.i386.rpm

Install it:
[root@ipc4 rpm]# rpm -ivh MySQL-devel-community-5.4.3-0.rhel4.i386.rpm


Note, make sure you download the correct dev package to match your MySQL server.


#c. Reinstall DBD::mysql
[root@ipc4 perl]# cpan DBD::mysql
CPAN: Storable loaded ok
Going to read /home/shan/perl/.cpan/Metadata
Database was generated on Tue, 15 Dec 2009 22:06:58 GMT
Running install for module DBD::mysql
Running make for C/CA/CAPTTOFU/DBD-mysql-4.013.tar.gz
CPAN: Digest::MD5 loaded ok
Checksum for /home/shan/perl/.cpan/sources/authors/id/C/CA/CAPTTOFU/DBD-mysql-4.013.tar.gz ok
Scanning cache /home/shan/perl/.cpan/build for sizes
DBD-mysql-4.013/
cflags (mysql_config) = -I/usr/include/mysql -g -pipe -m32 -DUNIV_LINUX
embedded (mysql_config) =
libs (mysql_config) = -rdynamic -L/usr/lib/mysql -lmysqlclient -lz -lcrypt -lnsl -lm -lmygcc
mysql_config (guessed ) = mysql_config
nocatchstderr (default ) = 0
nofoundrows (default ) = 0
ssl (guessed ) = 0
testdb (default ) = test
testhost (default ) =
testpassword (default ) =
testsocket (default ) =
testuser (guessed ) = root

….


You may get errors like below, that’s non-critical, it merely complains the DBD::mysql test can’t access the ‘test’ database with root account and password “NO”. You can always manually force the installation by entering the working directory ~.CPAN/build/module_name/ and type “make install”.

nt.t line 15
t/80procs...................skipped
all skipped: ERROR: Access denied for user 'root'@'localhost' (using password: NO). Can't continue test
t/85init_command............skipped
all skipped: ERROR: Access denied for user 'root'@'localhost' (using password: NO). Can't continue test
Failed Test Stat Wstat Total Fail Failed List of Failed
-------------------------------------------------------------------------------
t/00base.t 2 512 6 12 200.00% 1-6
35 tests skipped.
Failed 1/36 test scripts, 97.22% okay. 6/6 subtests failed, 0.00% okay.
make: *** [test_dynamic] Error 255
/usr/bin/make test -- NOT OK
Running make install
make test had returned bad status, won't install without force


Manually install:

[root@ipc4 DBD-mysql-4.013]# make install
Installing /usr/lib/perl5/site_perl/5.8.5/i386-linux-thread-multi/auto/DBD/mysql/mysql.so
Installing /usr/lib/perl5/site_perl/5.8.5/i386-linux-thread-multi/auto/DBD/mysql/mysql.bs
Files found in blib/arch: installing files in blib/lib into architecture dependent library tree
Installing /usr/lib/perl5/site_perl/5.8.5/i386-linux-thread-multi/DBD/mysql.pm
Installing /usr/lib/perl5/site_perl/5.8.5/i386-linux-thread-multi/DBD/mysql/GetInfo.pm
Installing /usr/lib/perl5/site_perl/5.8.5/i386-linux-thread-multi/DBD/mysql/INSTALL.pod
Installing /usr/lib/perl5/site_perl/5.8.5/i386-linux-thread-multi/Bundle/DBD/mysql.pm
Installing /usr/share/man/man3/DBD::mysql::INSTALL.3pm
Installing /usr/share/man/man3/Bundle::DBD::mysql.3pm
Installing /usr/share/man/man3/DBD::mysql.3pm
Writing /usr/lib/perl5/site_perl/5.8.5/i386-linux-thread-multi/auto/DBD/mysql/.packlist
Appending installation info to /usr/lib/perl5/5.8.5/i386-linux-thread-multi/perllocal.pod


#d. Verify the installation:
[root@ipc4 ~]# instmodsh
Available commands are:
l - List all installed modules
m - Select a module
q - Quit the program
cmd? l
Installed modules are:
DBD::mysql
DBI
Perl
mod_perl2
cmd? m DBD::mysql
Available commands are:
f [all|prog|doc] - List installed files of a given type
d [all|prog|doc] - List the directories used by a module
v - Validate the .packlist - check for missing files
t - Create a tar archive of the module
q - Quit the module
DBD::mysql cmd? d
all directories in DBD::mysql are:
/usr/lib/perl5/site_perl/5.8.5/i386-linux-thread-multi/Bundle/DBD
/usr/lib/perl5/site_perl/5.8.5/i386-linux-thread-multi/DBD
/usr/lib/perl5/site_perl/5.8.5/i386-linux-thread-multi/DBD/mysql
/usr/lib/perl5/site_perl/5.8.5/i386-linux-thread-multi/auto/DBD/mysql
/usr/share/man/man3
DBD::mysql cmd? v
DBD::mysql has no missing files
DBD::mysql cmd? f
all files in DBD::mysql are:
/usr/share/man/man3/DBD::mysql::INSTALL.3pm
/usr/share/man/man3/DBD::mysql.3pm
/usr/lib/perl5/site_perl/5.8.5/i386-linux-thread-multi/DBD/mysql/INSTALL.pod
/usr/lib/perl5/site_perl/5.8.5/i386-linux-thread-multi/DBD/mysql.pm
/usr/lib/perl5/site_perl/5.8.5/i386-linux-thread-multi/auto/DBD/mysql/mysql.bs
/usr/share/man/man3/Bundle::DBD::mysql.3pm
/usr/lib/perl5/site_perl/5.8.5/i386-linux-thread-multi/DBD/mysql/GetInfo.pm
/usr/lib/perl5/site_perl/5.8.5/i386-linux-thread-multi/auto/DBD/mysql/mysql.so
/usr/lib/perl5/site_perl/5.8.5/i386-linux-thread-multi/Bundle/DBD/mysql.pm
DBD::mysql cmd? q
cmd? q
[root@ipc4 ~]#


#e. Clean up:
If your server is installed RHEL 4.0 and it already has MySQL, Perl installed, you may need to do some cleaning work to make sure you are using the correct versions of the package for each components. The sooner you do the cleaning job, the better. Once you installed/configured Perl, MySQL, Python, PHP, etc, etc, you find out you need to upgrade a package that’s required by 100 packages, you will feel the pain. That’s why platform engineering is very important for open source technology.


On my system, I have RHEL 4.0, which installed very early version of mysqlclient and perl-DBD-mysql. In fact, the old version perl-DBD-mysql-2.9xx is not compatible with MySQL server 5.x. I need to remove all those obsolete packages without damaging the system.

remove mysqlclient10-3.23 and its dependencies:

[root@ipc4 rpm]# rpm -qa | grep mysql
mysqlclient10-3.23.58-4.RHEL4.1
[root@ipc4 rpm]# rpm -ql $(rpm -qa | grep mysql)
/etc/ld.so.conf.d/mysqlclient10-i386.conf
/usr/lib/mysql/libmysqlclient.so.10
/usr/lib/mysql/libmysqlclient.so.10.0.0
/usr/lib/mysql/libmysqlclient_r.so.10
/usr/lib/mysql/libmysqlclient_r.so.10.0.0

[root@ipc4 rpm]# rpm -e $(rpm -qa | grep mysql)
error: Failed dependencies:
libmysqlclient.so.10 is needed by (installed) perl-DBD-MySQL-2.9004-3.1.i386
libmysqlclient.so.10 is needed by (installed) MySQL-python-1.0.0-1.RHEL4.1.i386
libmysqlclient.so.10 is needed by (installed) MyODBC-2.50.39-21.RHEL4.1.i386
mysqlclient10 is needed by (installed) MySQL-python-1.0.0-1.RHEL4.1.i386

[root@ipc4 rpm]# rpm -e MySQL-python-1.0.0-1.RHEL4.1.i386
[root@ipc4 rpm]# rpm -e MyODBC-2.50.39-21.RHEL4.1.i386
[root@ipc4 rpm]# rpm -e MySQL-python-1.0.0-1.RHEL4.1.i386

also, remove the old perl-DBD-MySQL
[root@ipc4 rpm]# rpm -e perl-DBD-MySQL-2.9004-3.1.i386